it came to my attention that people are asking for reverse wound rickenbacker pickups. friend of mine brought me his 90's 360/12 and new pair of 7.4k toasters today. he was not happy with high gain pickups so i had a material on hands to take pictures for this mess below.
this is sort of how-to for simple mods of rickenbacker toaster pickup. some would consider rickenbacker toaster pickup the ultimate pickup. i would consider it good start in some cases. those cases include:
a) you want reverse wound pickup for hum free three pickup rickenbacker
guitar mod.
b) you have a bass with high gain pickup in neck position and you
don't want to attack the body with router to fit the toaster there.
c) you have rickenbacker 450, 460, 425 or 1966-70 360, 370, 330
etc. and normal new toaster has magnets too long so the problem is
same as the bass.
d) you want just reverse one of your existing pickups for silent
hum free middle position - so called "rwrp" like e.g modern telecaster
or stratocaster or almost any modern guitar with two single coil pickups
(yes rickenbacker does not do this as of this date 06/05/2008)
i came up with this myself in about 1992 when i scored dead cheap 68' 450/12 without pickups and modern "hot" toasters wouldn't fit. as i was fiddling with it anyway the reversing came just as natural thing to do once i had it apart. please do not use old pickups for this, you are ruining its value by doing it.
beware! if you do this to the new rickenbacker guitar you are voiding "the lifetime limited warranty" or whatever it is called these days.
before you go on and start changing everything on your guitar please consider if it is worth it to you. i feel that it is deliberate choice on the side of manufacturer to do it the way they do it - read on. if you are using middle position mostly it is imho worth it to do the mod, otherwise it is not, actually it is opposite, it will drive you crazy since each single pickup will sound much noisier than before when compared to hum canceled situation - it is relative but it can make you very sad later. it is not simple win win situation so think twice. i use mostly middle hum canceled position on all of my post 1971 12 strings that i did this mod to with janglebox with treble boost on to get the piercing sounds i want when i want them. (however i think that this mod performs its best in 3 pickup guitars e.g. my 370/12rm without active circuit. i put such mod_ed pickup in the middle and wired it to 5th knob and use this mixer 5th mystery knob to blend it in if i need it. neck pickup and bridge pickup are wired like two pickup guitar). again think twice if this is what you want. of course the best would be if there was ready replacement pickup like e.g. kinman makes for fender guitars, unfortunately this is not happening, i tried to plug it in australia long ago and got no response ever. also it is well known situation that ric corp. is guarding its look and feel (whatever that means to them) so it is rather strong argument for people not to make anything even remotely looking like rickenbacker - which - in this case i find rather sad.
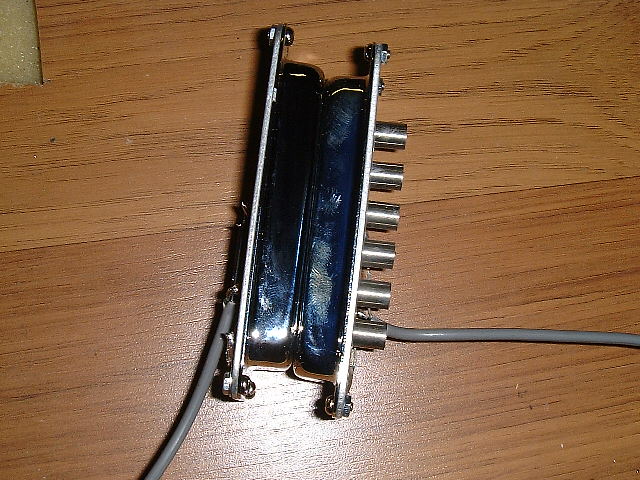
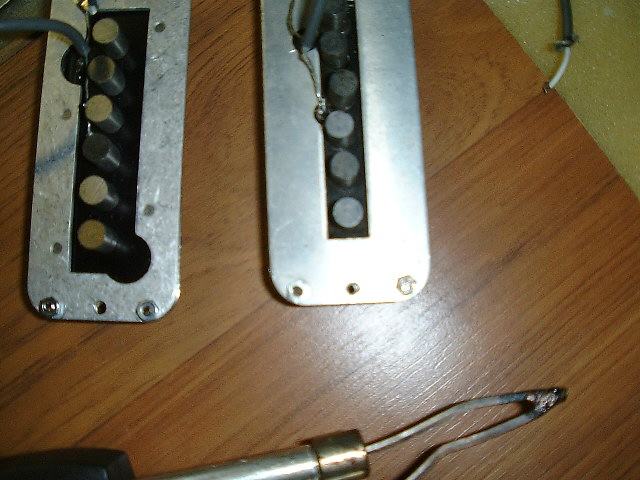
anyway ....how to tell which pickup is old? here is a picture of 1966 450 bridge (on the right) and new 7.4k (on the left). the old one has different bottom plate and you can see the alnico magnets sitting in a bit of a fan pattern on the old one. again please do not mod the old ones. just get a new one or use reissue for the mod.
so what do you need for hum cancel? : pair of new rickenbacker pickups - around $300 or pair of toasters that are in your reissue, some tools and bit of time and if you want shorter magnets than shorter magnets. i have a stash of short alnico 5 from magnetsource and since they don't sell smaller quantities i had to get about 80 of them to fill the smallest possible order. i like them and most people who hear them in the neck position of my 1980 450/12 want them for their mod too. it does sound very much like real 60's pickup to me.
i will use :
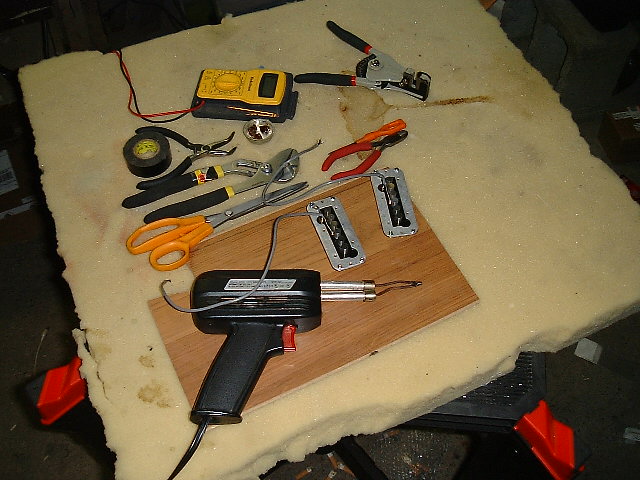
i use no other soldering iron here. some people get seasick when they see big soldering gun around pickups so to those i say: back off buddy! i would not use it if the magnets were there inside the pickup. go on - read on...
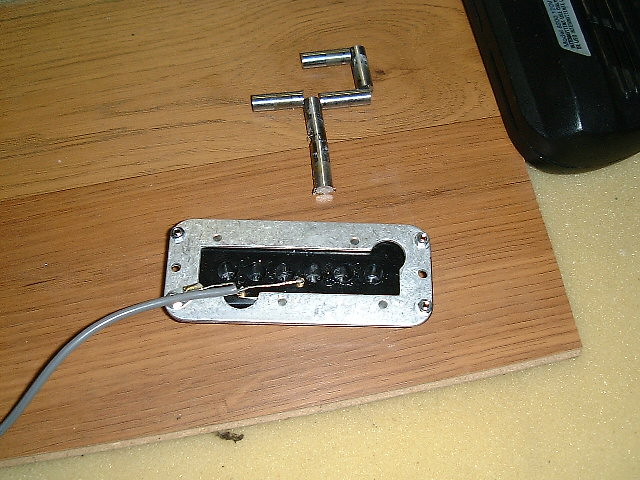
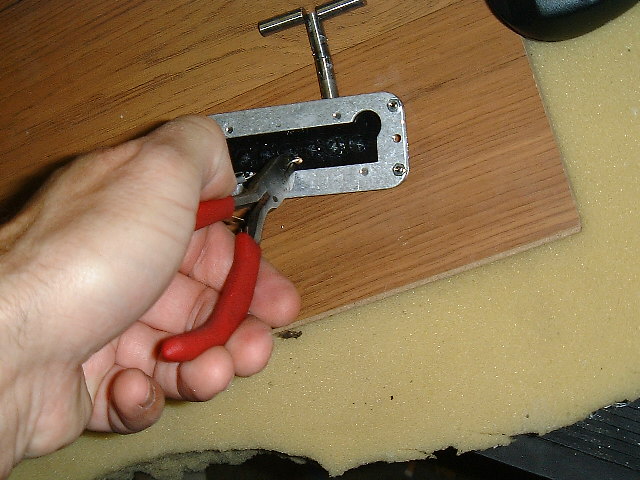
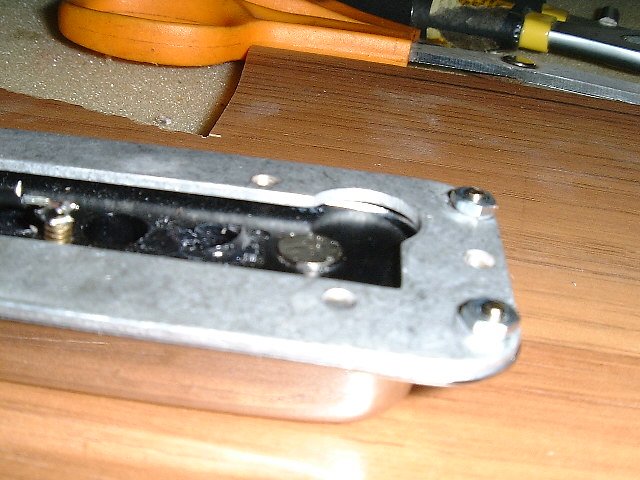
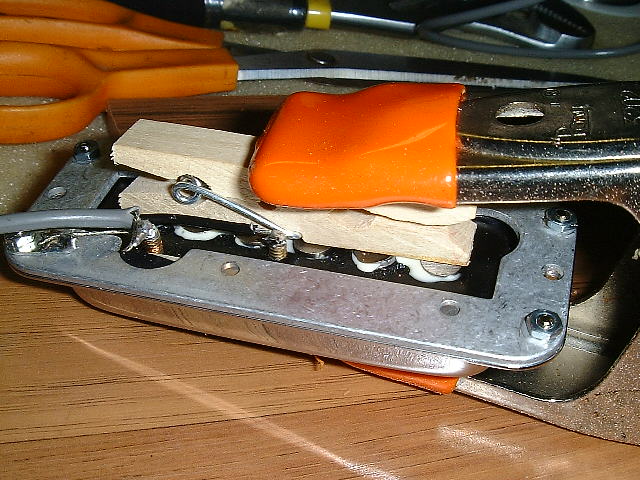
first step is to pull out the magnets. these magnets used to be glued in with white glue in the past. now it is some sticky dark substance that makes it harder to get them out. mark them on the bottom if you can't tell polarity and proceed with pliers. it is not uncommon that the magnets will chip in the process. do not despair. it doesn't matter much if it chips a bit. -. just make sure you will not break the pickup bobbin. when you have magnet chipped a tiny bit it can still go back there, i'd put it there under b strings on 12 sting (and under g string on 6 string if i use plain steel string there). it will not make much difference, the field will be slightly weaker there - which is frankly good in both cases.
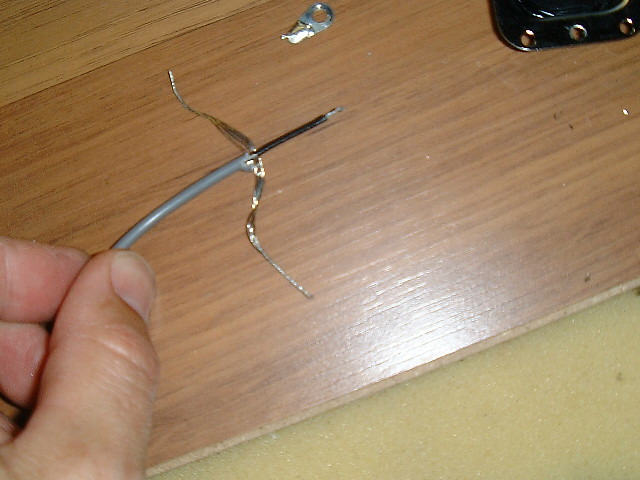
i do this as second step but some would say do it first so it is up to your wishes. cut the wires. take great care with this. the terminals are very very touchy. that's why it makes sense to me to cut it instead of unsoldering it. once the coil is open at the beginning (the right terminal on the picture above) from overheating or other mechanical force the only remedy is completely new coil.
snip!
and snip! and snip (that last one is the lazy one) than take it apart:
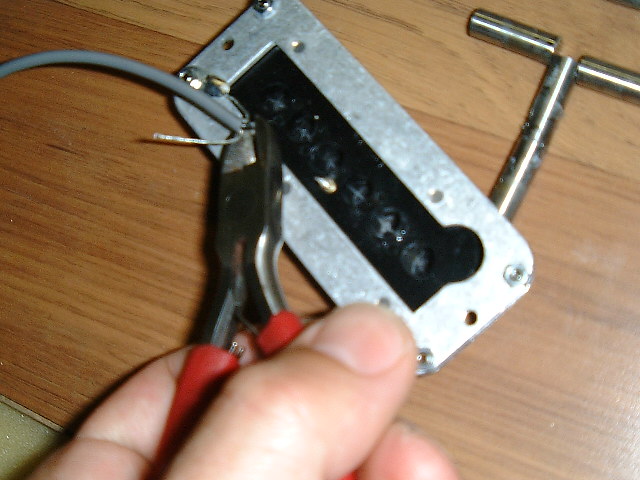
strip bit of insulation of the lead
next solder hot (black insulated wire here) to the terminal all the way on the right in the picture below and ground to the middle terminal leaving the second strand of ground wire for the ground of the casing. !!!!!do not overheat the terminals!!!! it will melt the bobbin and break the connection and ruin the pickup. put enough solder on the wire so it will go just touch touch and it will be attached. you have been warned!
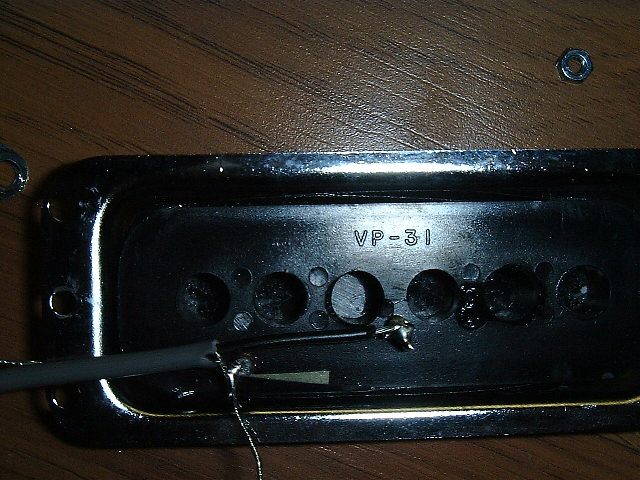
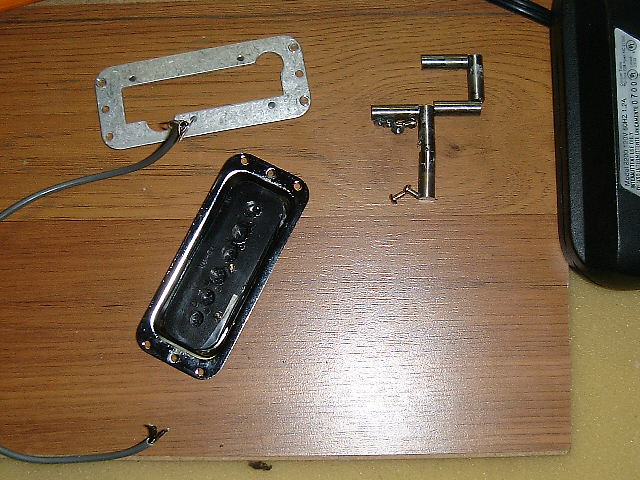
put the whole contraption together and solder the final wire strand to the casing eyelet.
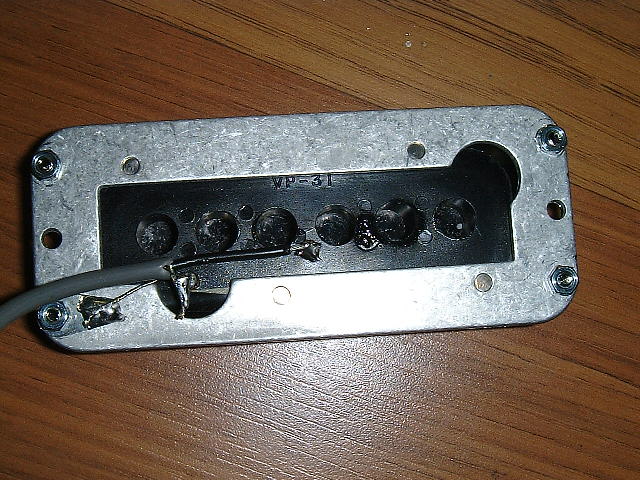
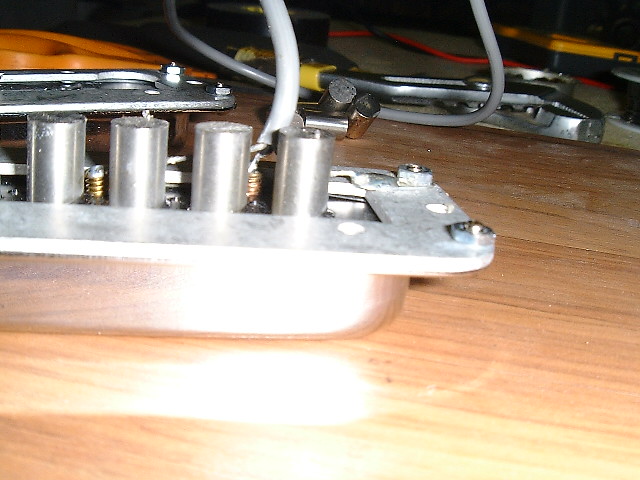
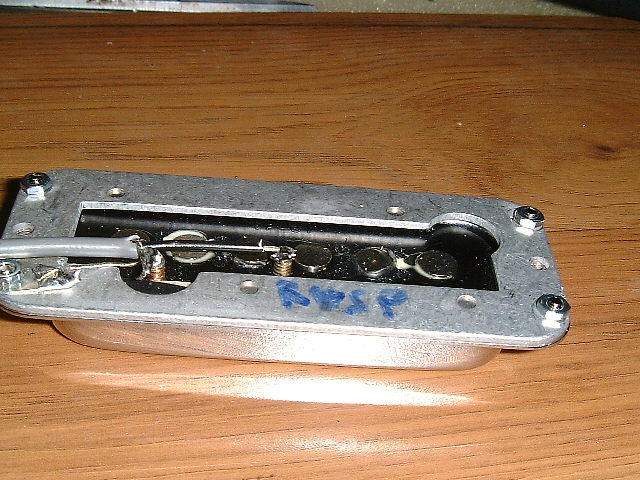
now for the magnets: you can either put the original magnets backwards in for hum cancel (any that chipped can go there as well unless it is really bad) or put whatever magnets you want inside for your desired effect..
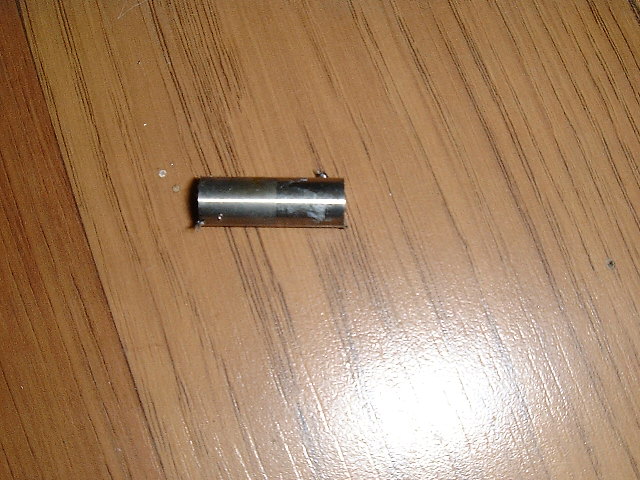
above is the original magnet. can you tell what part was inside? yes, the dull one - it reacted with that new glue . when they used the older glue it was all green and rusted from reaction too so it was easier to tell. here the shiny end goes inside now, or the one you marked before it was disassembled so it would be reverse..
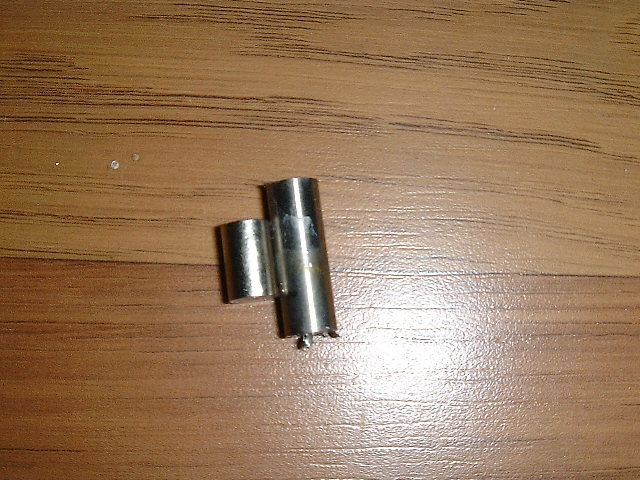
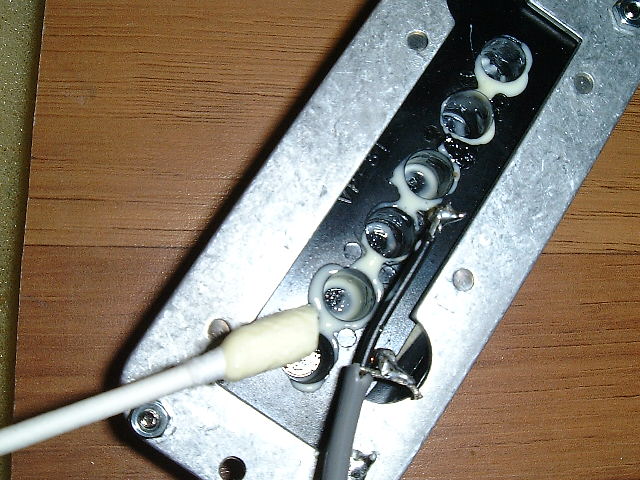
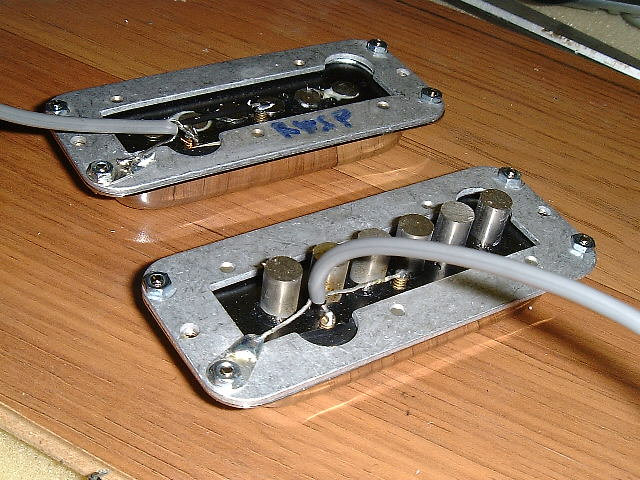
we are going to use short magnets per request here. the difference is clear:
i take my fav glue - titebond - and apply it with q-tip to hold them - the magnets - there. the magnets have to be inserted with opposite polarity from your other pickup if you want hum canceling - this is crucial and it will not work to cancel the hum other way.
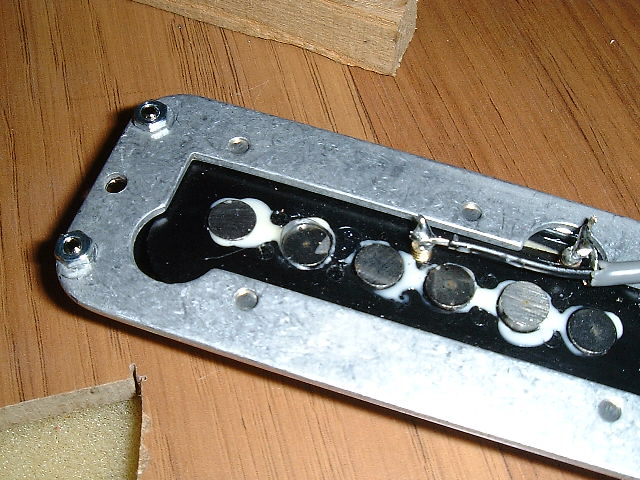
it is there & clamped so they would not decide to jump out and to party on the floor. i have two hours to go to read some alexandre dumas book to my kids and to pay attention to my wife, and to our cats, and to my blood sugar levels as well.
two hours later the titebond has set enough that it doesn't need clamp anymore (unless there was too much of it) so i let it dry without clamp and mark it on the bottom for some poor repairman later when the guitar goes elsewhere so the mix-ups can be avoided.
the pair side by side. very very close to 66-71 neck pickup in structure + middle switch position = both pickups engaged = hum free (my aim here).
is it really all that is to it? yes. and proof that they have now opposite polarity is below - yes they stick together in one long lasting french kiss face to face which also means that my 5th grade communist czechoslovak school magnetism lecture was not forgotten yet. hurrah!